Mold assembly sequence
Mold assembly is the process of assembling finished mold parts into a complete mold according to a specific sequence and requirements. A reasonable assembly sequence ensures mold assembly accuracy and performance, minimizing assembly errors and rework. Mold assembly must adhere to the principles of “benchmarks first, then general work; bottom first, then top; inside first, then outside; difficult first, then easy.” This process should be performed step by step, ensuring accurate relative positioning and coordinated movement of all parts. While the assembly sequence for different mold types (such as stamping molds and plastic molds) may vary slightly, the basic process remains similar.
The preparation work before mold assembly is the basis for ensuring assembly quality, which mainly includes the cleaning and inspection of parts and the preparation of tools. First, all parts need to be cleaned with kerosene or detergent to remove oil, iron filings and rust on the surface, especially the guide surface and the mating surface, which need to be polished with fine sandpaper to remove burrs. Then the parts are inspected to check whether the size, shape and surface quality meet the requirements of the drawings, such as the straightness of the guide column and the sharpness of the cutting edge of the die. Unqualified parts need to be repaired or replaced. Prepare the necessary assembly tools, such as wrenches, copper hammers, screwdrivers, dial indicators, marble slabs, etc. The accuracy of the dial indicator must reach 0.01mm, and the flatness of the marble slab must be ≤0.005mm/100mm to provide a benchmark for assembly.
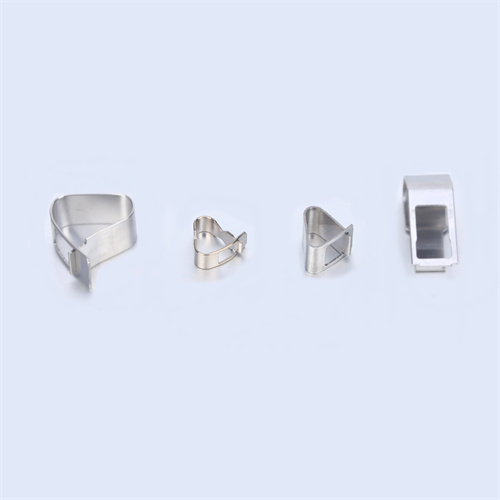
The assembly sequence for a stamping die typically begins with the lower die. The lower die base is secured to the assembly platform, with its bottom surface serving as the reference for assembly. First, install the lower die’s guide components, pressing the guide pins into the guide pin holes in the lower die base. Use a dial indicator to check the verticality of the guide pins, ensuring a flatness of ≤0.01mm/100mm. Next, install the die, placing it in the mounting position of the lower die base. Supported by contour blocks, the die’s horizontality is aligned using a dial indicator, ensuring a flatness of ≤0.01mm/100mm. Pre-tighten the die with bolts, and finally, position and tighten the bolts using the locating pins. Next, install the remaining lower die components, such as the stripper plate and ejector assembly, ensuring a uniform gap between the stripper plate and the die and smooth movement of the ejector assembly.
After the lower die is assembled, proceed to the upper die. Using the top surface of the upper die base as a reference, first press the guide sleeve into the guide sleeve hole of the upper die base, ensuring a uniform clearance between the guide sleeve and the guide pin (0.005-0.01mm). Then, install the punch retaining plate and secure the punch to the plate, ensuring a verticality of ≤0.01mm/100mm. Clamp the upper and lower die bases together using the guide pins and guide sleeves. Adjust the clearance between the punch and die to ensure uniform clearance around the perimeter, with an error of ≤0.01mm. Secure the punch retaining plate relative to the upper die base with locating pins and tighten the bolts. Finally, install the remaining upper die components, such as the die handle and punching mechanism, ensuring a coaxiality of ≤0.02mm between the die handle and the upper die base.
The assembly sequence for plastic molds is similar to that for stamping molds, but special attention must be paid to the precise fit between the cavity and core, as well as the assembly of the ejection mechanism. First, assemble the fixed mold. Secure the fixed mold plate to the assembly platform, install the fixed mold inserts and guide pins, and ensure that the inserts meet the required flatness and verticality. Next, assemble the movable mold. Install the movable mold plate, core, and ejector mechanism in sequence. The ejector mechanism must ensure the accurate relative positioning of the ejector pin and core, and smooth movement without jamming. When closing the mold, adjust the clearance between the fixed and movable molds to ensure a close fit between the parting surfaces, with a clearance of ≤0.01mm. Then install the guide sleeves, tie rods, sprue bushings, and other components. Finally, connect the cooling and hydraulic systems, and check that the pipes are unobstructed and leak-free.
The final stage of mold assembly is overall adjustment and mold trialing. This involves adjusting the clearance and stroke of each moving part. For example, the ejection stroke of the ejector mechanism must be 5-10mm greater than the product height to ensure smooth demolding. Mold trials are conducted on the appropriate equipment, such as stamping dies on a press and plastic molds on an injection molding machine. The working state of the mold is observed, and the dimensions and surface quality of the product are checked. Adjustments are made based on the results of the mold trial. For example, if a stamping part has burrs, the male and female mold edges need to be ground, and if a plastic part has flash, the parting surface clearance needs to be adjusted. After the mold trial passes, the mold is cleaned and rust-proofed, coated with anti-rust oil, and an identification plate is installed, completing the entire assembly process. A reasonable assembly sequence improves assembly efficiency, ensures mold quality and performance, and is a key step in mold manufacturing.