Calculation of each height of continuous drawing
Continuous deep drawing is a process that gradually forms a large-diameter blank into a small-diameter, tall cylindrical part through multiple deep drawing cycles. Calculating the height of each draw cycle is crucial for ensuring the final part size and quality. The height of each draw cycle must be determined based on the material’s plasticity, the drawing coefficient, and the dimensions of the previous draw cycle to ensure uniform deformation and avoid cracking or wrinkling. Calculating each draw cycle height, based on the law of conservation of volume and taking into account the effects of material thinning and springback, is a core element of continuous deep drawing process design.
The calculation of the first drawing height requires the combination of the blank diameter and the first drawing coefficient. The formula is: h₁ = (D₀² – d₁²) / (4d₁) – 0.5 (rconcave₁ + rconvex₁ ) , where h₁ is the first drawing height, D₀ is the blank diameter, d₁ is the diameter after the first drawing ( d₁ = m₁×D₀ , m₁ is the first drawing coefficient), rconcave₁ and rconvex₁ are the corner radii of the first drawing die and punch, respectively . For example, if the blank diameter D₀=200mm , the initial drawing coefficient m₁=0.55 , d₁=0.55×200=110mm , rconcave₁ = 10mm , and rconvex₁ =8mm , then h₁=(200² – 110²)/(4×110) – 0.5 × (10 + 8)=(40000 – 12100)/440 – 9=27900/440 – 9≈63.41 – 9≈54.41mm. The initial drawing height must be kept within a reasonable range. Excessive height will result in excessive deformation and increase the risk of fracture.

The height calculation of the second drawing must be based on the size after the first drawing. The formula is: h₂ = (d₁² – d₂²)/(4d₂) + h₁’ , where d₂ is the diameter after the second drawing ( d₂ = m₂×d₁ , m₂ is the second drawing coefficient), and h₁’ is the actual height after the first drawing (the effect of material thinning must be taken into account, which is usually 1%-3% smaller than the theoretical calculated value ). For example, if after the first drawing, d₁=110mm and h₁’=53mm (accounting for 1.5% thinning), and the second drawing coefficient m₂=0.7 , d₂=0.7×110=77mm , then h₂=(110² – 77²)/(4×77) + 53=(12100 – 5929)/30 8 + 53=6171/308 + 53≈20.04 + 53≈73.04mm. The increase in height during the second drawing should be moderate, generally not exceeding 50% of the initial height, to avoid overstretching the material.
The calculation of the height of subsequent deep drawing follows a similar rule. The nth drawing height h ₙ = (d ₙ₋₁² – d ₙ² )/(4d ₙ ) + h ₙ₋₁ ‘ , where d ₙ = m ₙ× d ₙ₋₁ , m ₙ is the nth drawing coefficient, and h ₙ₋₁ ‘ is the actual height after the n-1th deep drawing. For example, if the third drawing coefficient is m₃=0.75 , d₂=77mm , d₃=0.75×77 ≈ 57.75mm , and h₂’=72mm (considering a 1.4% thinning), then h₃=(77² – 57.75²)/(4×57.75) + 72=(5929 – 3335)/231 + 72=2594/231 + 72 ≈ 11.23 + 72≈83.23mm. The height increase in subsequent drawing gradually decreases because as the diameter decreases, the plastic reserve of the material decreases, and the degree of deformation needs to be gradually reduced.
The height distribution of successive drawing passes should follow the principle of “fast first, slow later,” meaning the height increases rapidly in the first few draws, and more slowly in the subsequent ones. The first draw height is typically 30%-40% of the final height, the second 50%-60%, and the final draw close to the final height (allowing for trimming). For example, for a final part height of 100mm, the first draw height would be 55mm (55%), the second 75mm (75%), and the third 95mm (95%), with trimming finally bringing the height to 100mm. This distribution method fully utilizes the material’s plasticity, reduces the number of draws, and improves production efficiency. Height distribution also needs to consider the uniformity of the part’s wall thickness. The height increase during each draw must match the diameter reduction to ensure that the wall thickness increases and decreases within the allowable range (generally, the reduction rate is ≤15%).
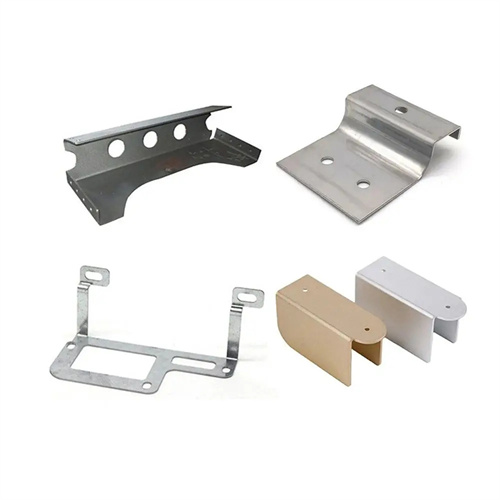
The height calculation formula for continuously drawn parts of special shapes (such as those with flanges or steps) requires adjustments. The initial draw height of flanged parts must take into account the flange material. The formula is h₁ = (D₀² – d₁² – dconvex₁² )/(4d₁) – 0.5 (rconcave₁ + rconvex₁ ) , where dconvex₁ is the flange diameter. For stepped parts, each subsequent height calculation must be performed step by step, first calculating the large step height, then the small step height, to ensure a reasonable height ratio for each step. For example, a two-step part with a large step diameter of 80mm and a height of 50mm and a small step diameter of 50mm and a height of 30mm would be drawn to an initial diameter of 80mm and a height of 50mm , followed by a secondary draw with a small step diameter of 50mm and a height of 30mm (a total height of 80mm). This targeted height calculation ensures the forming quality of special-shaped parts and avoids excessive local deformation.
